Create a Google Account without G-Mail
This article will outline the steps necessary to create a Google account without a G-Mail address. This is beneficial if you have a provider-issued email address and want the Google account to reference that e-mail.
- Visit https://accounts.google.com/
- Note that if you are already signed into a Google Account, visiting this URL will take you to a webpage that shows your account information. You can click on your photo (or the image place holder) in the upper right-hand corner to see which account(s) is signed in.
- If you discover you already have a suitable Google account, you can simply use that account and cease working through these steps.
- If you still need to create a new account, click “Sign out of all accounts” or open a Guest/incognito window and proceed to step 3.
- Once you confirm you are signed out of any existing accounts, you should see the following screen when visiting https://accounts.google.com/
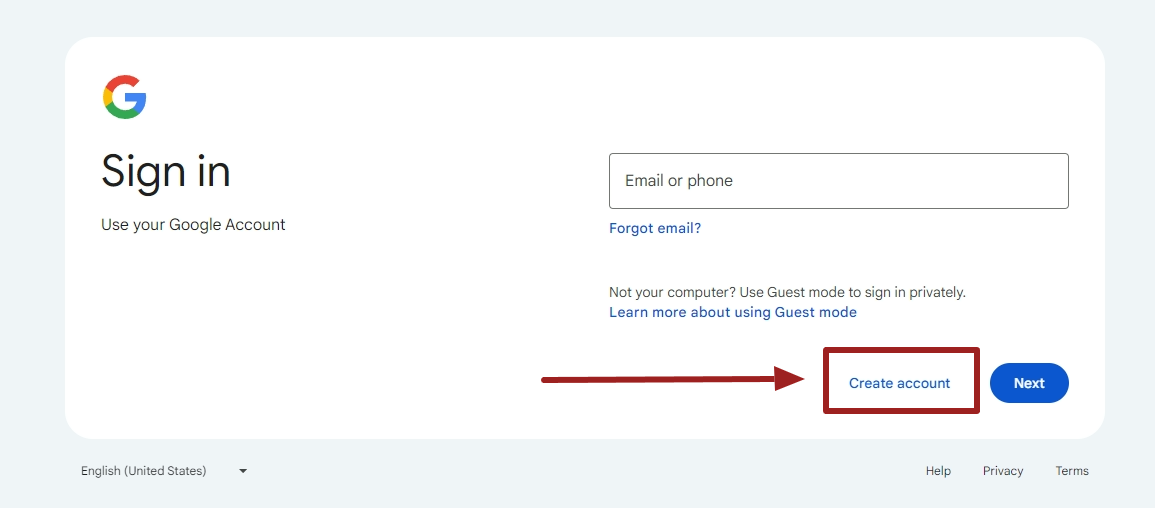
- Select “For my personal use.” This is important since the “for my work or business” option requires signing up for a paid Google Workspace account which you only need if your IT department is using Google Workspace as its email processing and document management software.
- Fill out your name.
- Enter your birthday and gender.
- Important Step: On the page that says “Choose your email address,” instead, click “Use your existing email”
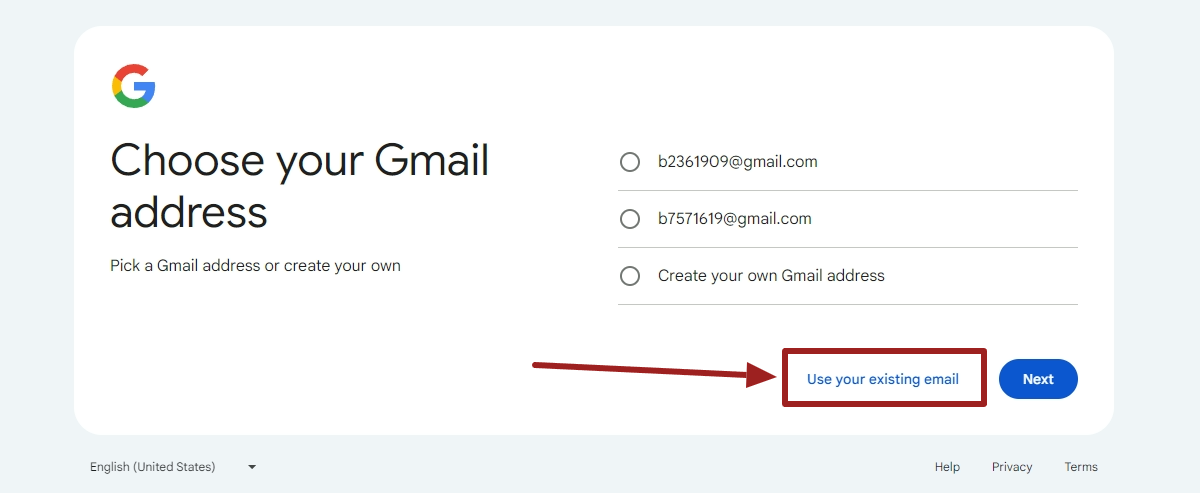
- Enter your desired existing email address that you want to use for your Google Account (e.g. your work email address or other branded email address).
- If you see a notice that says, “… username is taken. Try another…,” that means you already have a Google account created for that email address. Instead of creating a new account, you should simply try to sign in at https://accounts.google.com/ with email account and use the “Forgot Password” option.
- Verify your email address with the code sent to the email address you entered.
- Enter a password and supply any supporting contact information if prompted.
- Review and accept the terms and conditions of your Google Account.
- Now you may use your new Google Account.
- Pro Tip: Be sure to add a recovery phone number and recovery email address to avoid getting locked out of your account in the future.
No comments to display
No comments to display