Zoho
Zoho Mail - Access via IMAP
Enable IMAP Access
To enable IMAP Access for your email account:
- Login to Zoho Mail
- Go to Settings
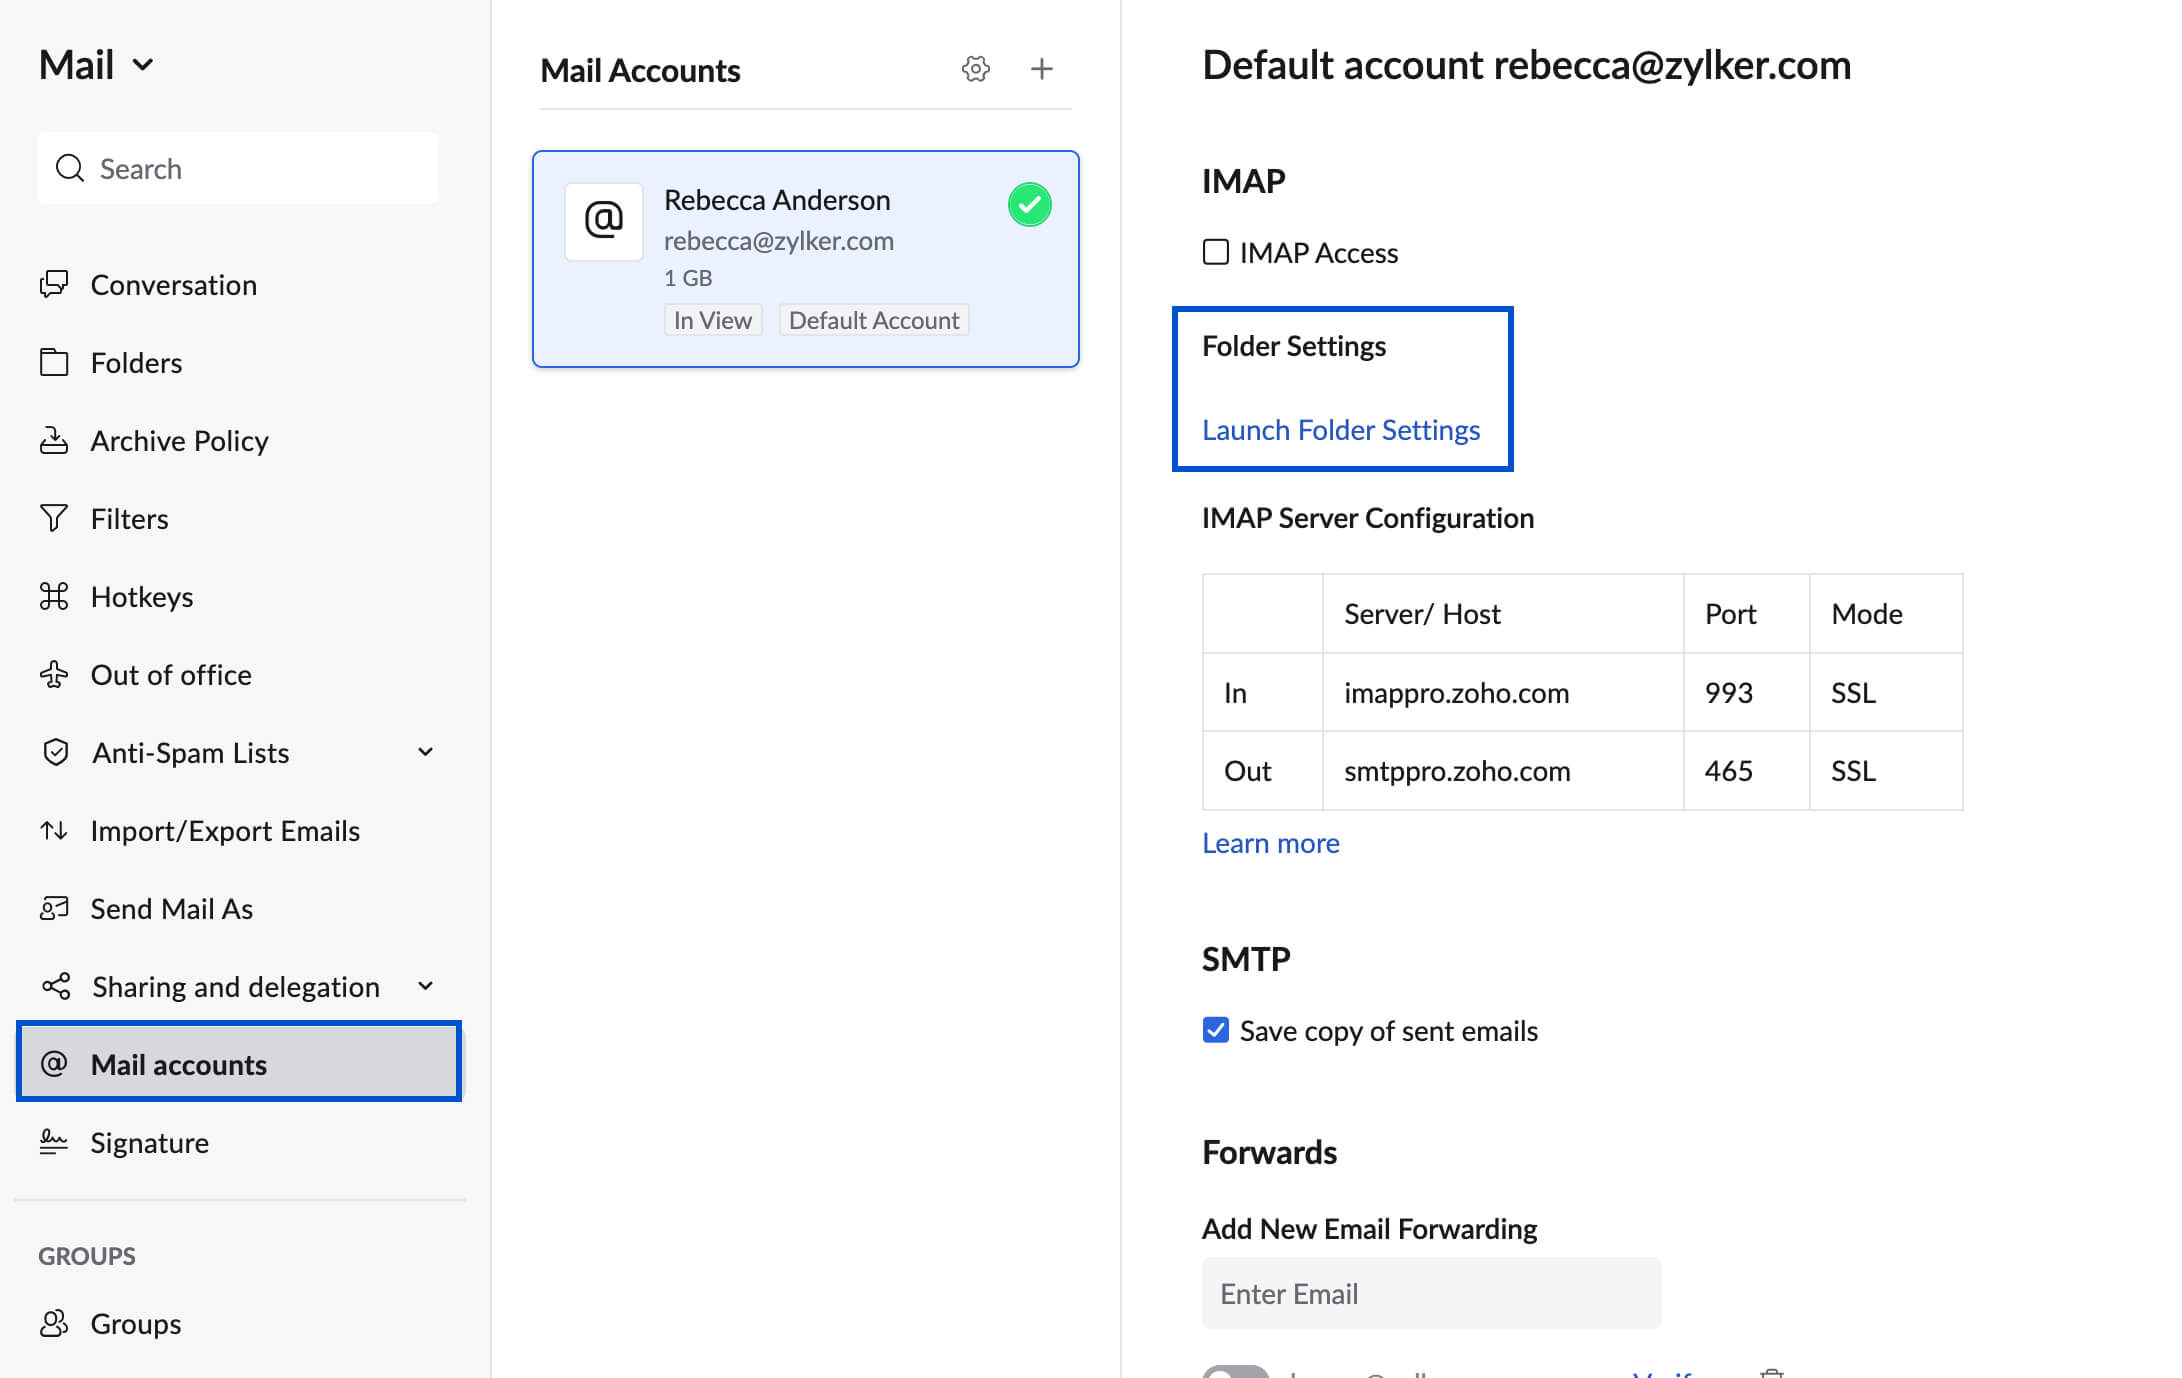
- Navigate to Mail Accounts and click the primary email address from the Mail accounts listing.
- Under the IMAP section, check the IMAP Access checkbox.

- You can also choose to enable Auto-Expunge, Include Archived emails, and configure Folder Settings.
- Scroll down and click Save.
Zoho Mail IMAP Server Details
You can configure your Zoho Mail account on any standard IMAP client with the configuration details given below.
Incoming Server Settings
Incoming Server Name: imappro.zoho.com
Port: 993
Require SSL: Yes
Username: you@yourdomain.com
Outgoing Server Settings (Paid Organization users with a domain-based email address, you@yourdomain.com):
Outgoing Server Name: smtppro.zoho.com
Port: 465 with SSL or
Port: 587 with TLS
Require Authentication: Yes
User Name: Enter your complete Zoho Mail address. NOTE: your email address will be in the format you@yourdomain.com.
Email Address: Enter Your Zoho Mail address. NOTE: your email address will be in the format you@yourdomain.com.
Password: Enter your Zoho account password. (You might require an Application-specific Password if Two-factor Authentication is enabled).
Folder View Settings for IMAP
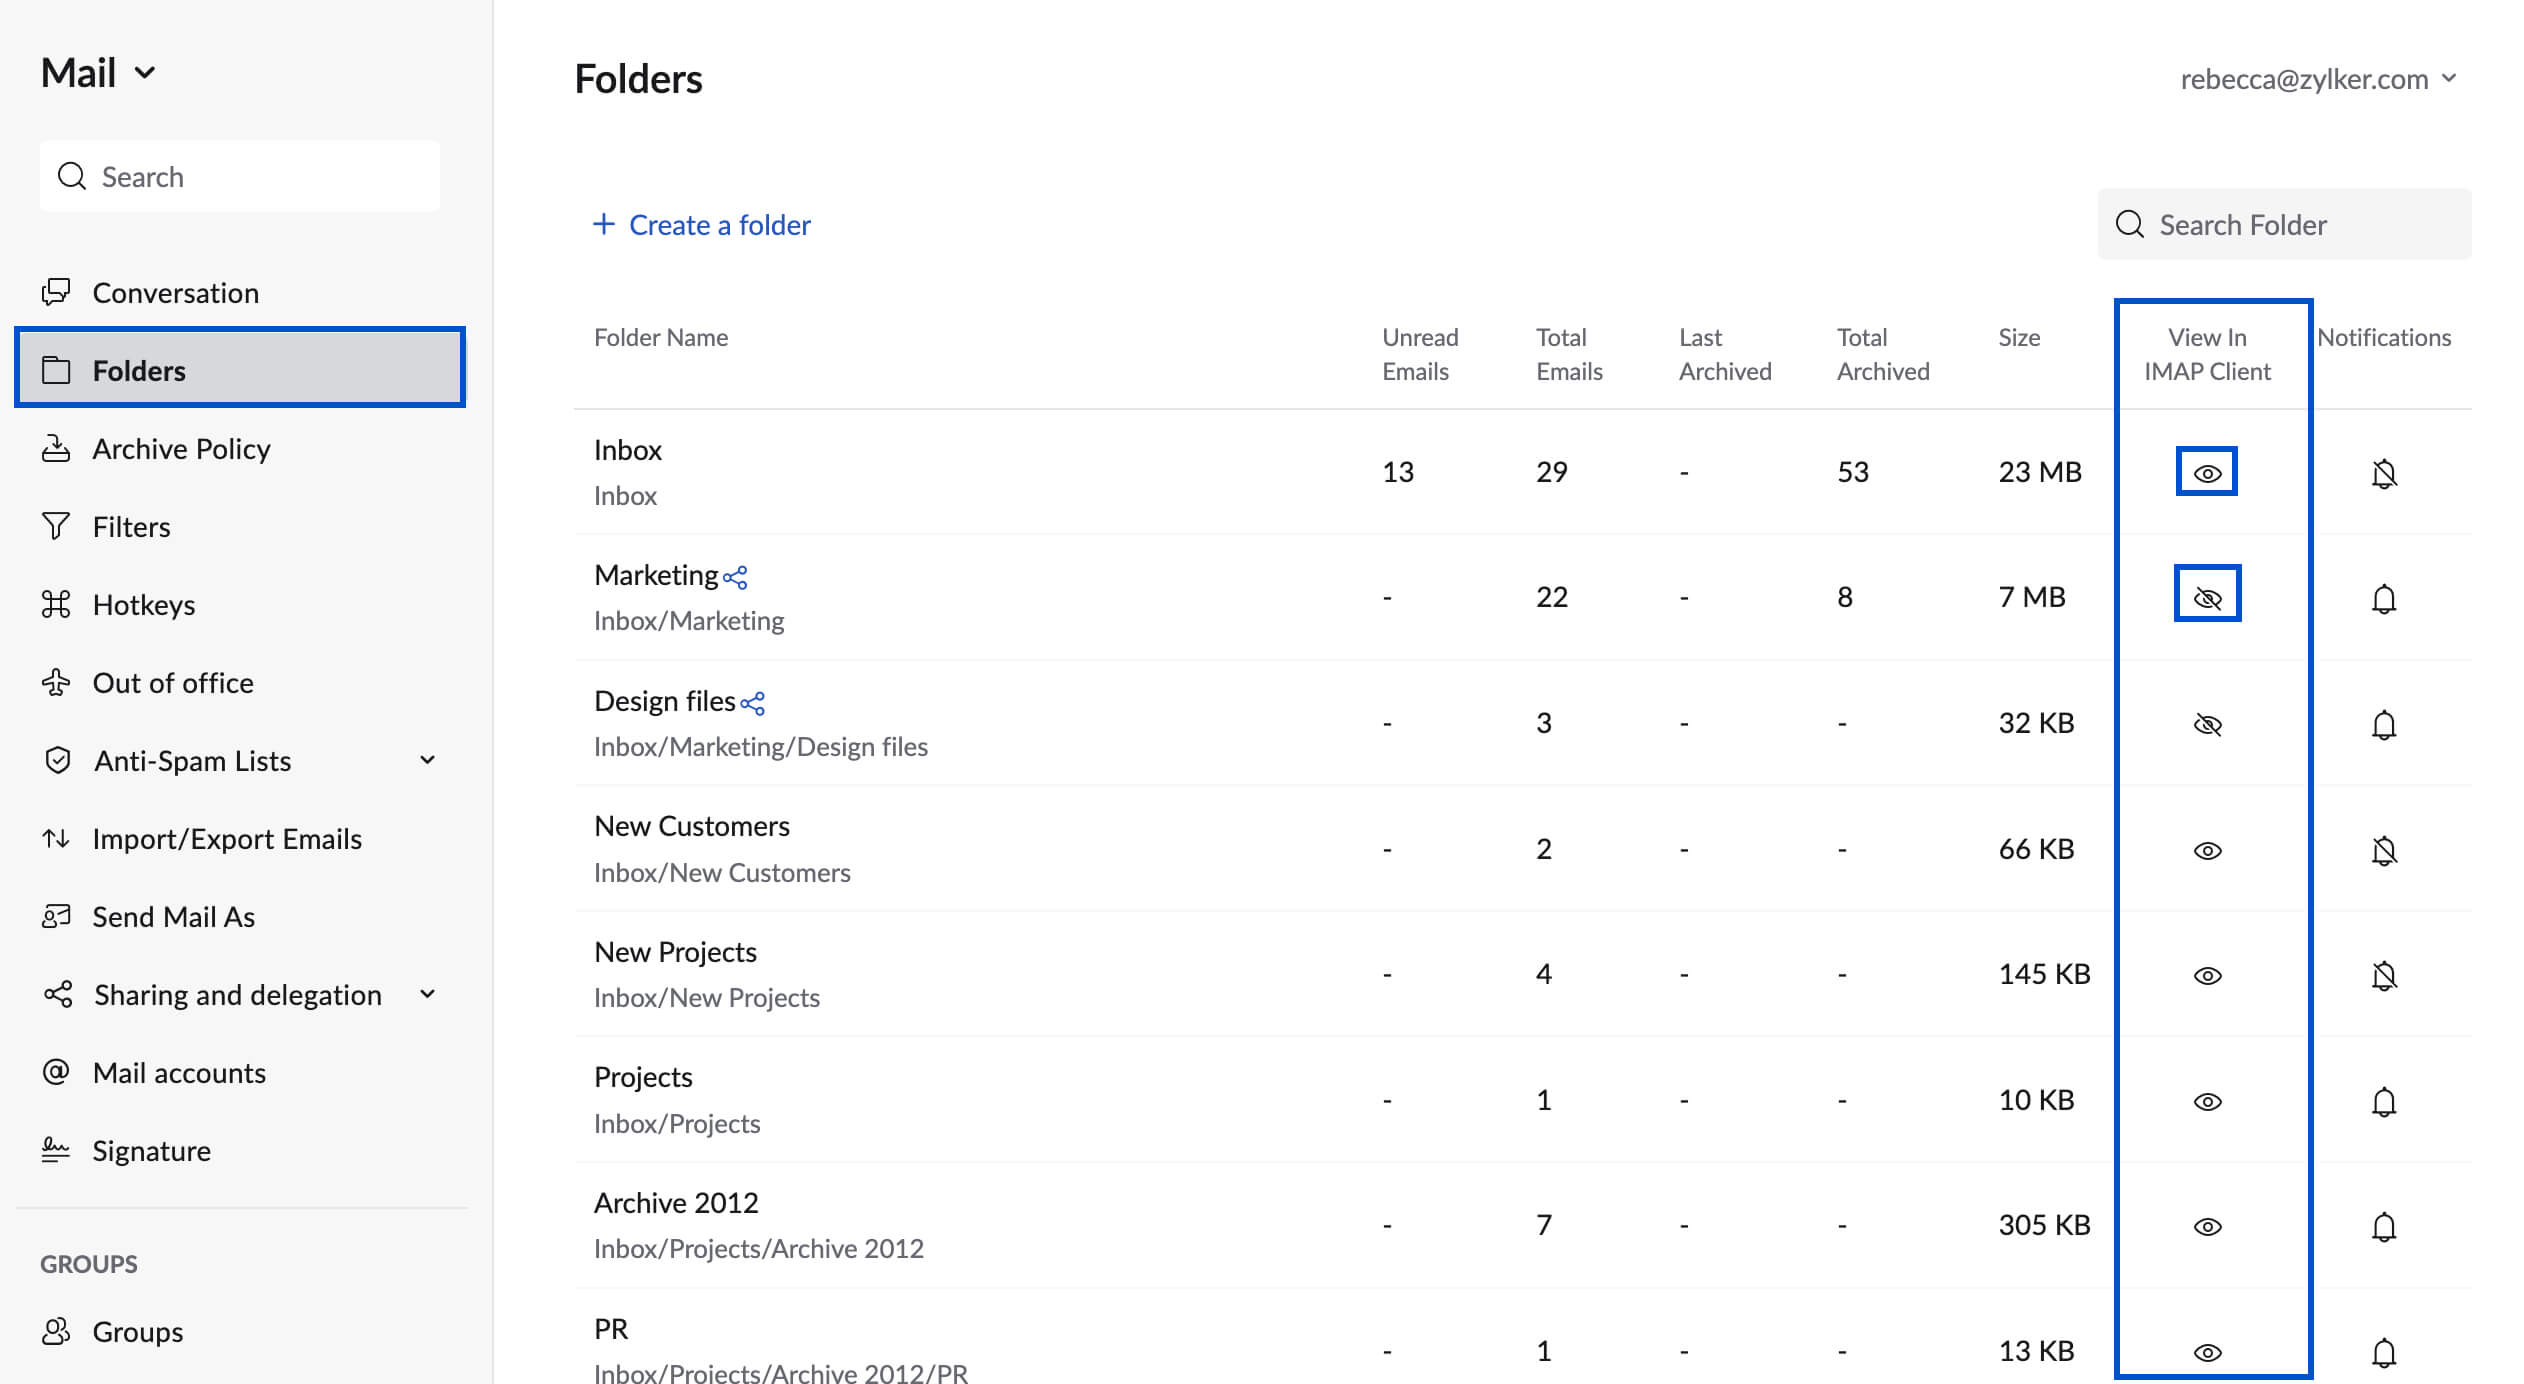
A huge mailbox with many folders can be cumbersome to view and synchronize emails in IMAP clients. To optimize your IMAP client's performance, you can choose the folders you want to synchronize with IMAP using the steps below:
- Login to Zoho Mail
- Go to Settings
- Navigate to Mail Accounts and click the primary email address from the Mail accounts listing.
- Under the IMAP section, click Launch folder settings.
- Select the folders you want to view in the IMAP clients.
Note:
- Only the folders selected here will be available in the IMAP clients you use.
- Folders that have been shared with you can be viewed from the IMAP clients on desktop and mobile phones.
- Thunderbird Client supports the Read and Write Folder Sharing options in Zoho Mail. Learn more.
IMAP Expunge Options
When you delete an email or move it to another folder in your IMAP client, the email will be deleted or moved to another folder based on your IMAP settings. To make these changes immediately in your IMAP account, you can enable the 'Expunge Immediately' option with the steps below.
- Login to Zoho Mail
- Go to Settings
- Navigate to Mail Accounts and click the primary email address from the Mail accounts listing.
- In the IMAP Section, select your preferred Expunge option for IMAP
- Check Auto-Expunge Mails - This will remove messages from the Zoho Mail server when you delete/ move emails in the IMAP client.

- Uncheck Auto-Expunge Mails - This option will not delete the emails unless they are manually expunged from the IMAP client.
- Check Auto-Expunge Mails - This will remove messages from the Zoho Mail server when you delete/ move emails in the IMAP client.
- Scroll down and click Save.
Include Archived emails
Zoho Mail supports the option of including the emails in the All Archived view of your inbox when you configure Zoho Mail as an IMAP account in other email clients.
To include archived emails in IMAP access:
- Login to Zoho Mail
- Go to Settings
- Navigate to Mail Accounts and click the primary email address from the Mail accounts listing.

- In the IMAP section, check the Include Archived emails checkbox.
- Scroll down and click Save.
When you access your Zoho Mail account using IMAP, the archived emails will be accessible in the respective folders from which they were archived.
Troubleshoot IMAP Configuration
Unable to Login from IMAP Clients
In case you have turned on Two-Factor Authentication for your account, you need to generate and use the Application-specific Password in the IMAP client you use.
In case you are a Federated Sign In user (Using Sign in using Google Apps/ Gmail/ Facebook etc), you might not have an exclusive password in Zoho for your email account and so you will be required to generate a password for your account. You cannot 'Sign In' using your external account for POP/ IMAP/ Active Sync.
IMAP Access is not enabled
You need to have IMAP Access enabled for your account, before configuring IMAP in the other email clients. Refer to this section for instructions.
In case you are an Organization user, check with your administrator if IMAP Access is allowed for your account based on the email policies.
SAML login accounts
For organizations using SAML authentication, the users need to generate and use the Application Specific Password to configure Zoho Mail as an IMAP account in other email clients.
Two-factor Authentication
How Two Factor Authentication works:
Access via a web browser:
- Step 1: User logs in with their Username and Password
- Step 2: If the entered password is correct, the user will receive a unique and random one-time password. (via SMS/Voice call or QR Code as per TFA configuration)
- Step 3: Provide the one-time password (OTP) in the browser. If correct, access to the account is granted.
Access via POP/ IMAP or Active Sync protocols:
- Step 1: The user generates a unique Application-specific Password for each external application used.
- Step 2: During the configuration of the Zoho account in the application, provide the 12 digits Application-specific Password, instead of the regular password.
- Step 3: Upon successful validation, you will be able to access your account.
Given that application-specific passwords never expire, you will not be required to update the password in your application, even if your web password expires. You can revoke an application-specific password from the TFA settings to remove access for a particular application. Apart from that, during password reset a user can revoke an application-specific password by revoking auth tokens.
Via Zoho Mail Apps for iOS and Android (Apps created and published by Zoho):
Zoho Mail provides mobile applications (iOS and Android) to access your Zoho Mail and Streams with its full set of features from smartphones. You can directly login to your account via these apps without application-specific passwords. And when two-factor authentication is enabled, all you need to provide is the one-time password.
- Step 1: User logs in with Username and Password.
- Step 2: User gets a secure code via SMS/ Voice call or QR Code app linked with the account during set up.
- Step 3: The user provides the secure code in the mobile app, to access the account.
Enable two-factor authentication for your organization
When you enable TFA to your organization, all the users part of your organization will be required to provide the additional security code to login and access their account. To enable TFA for your organization,
- Login to Zoho Mail Admin Console
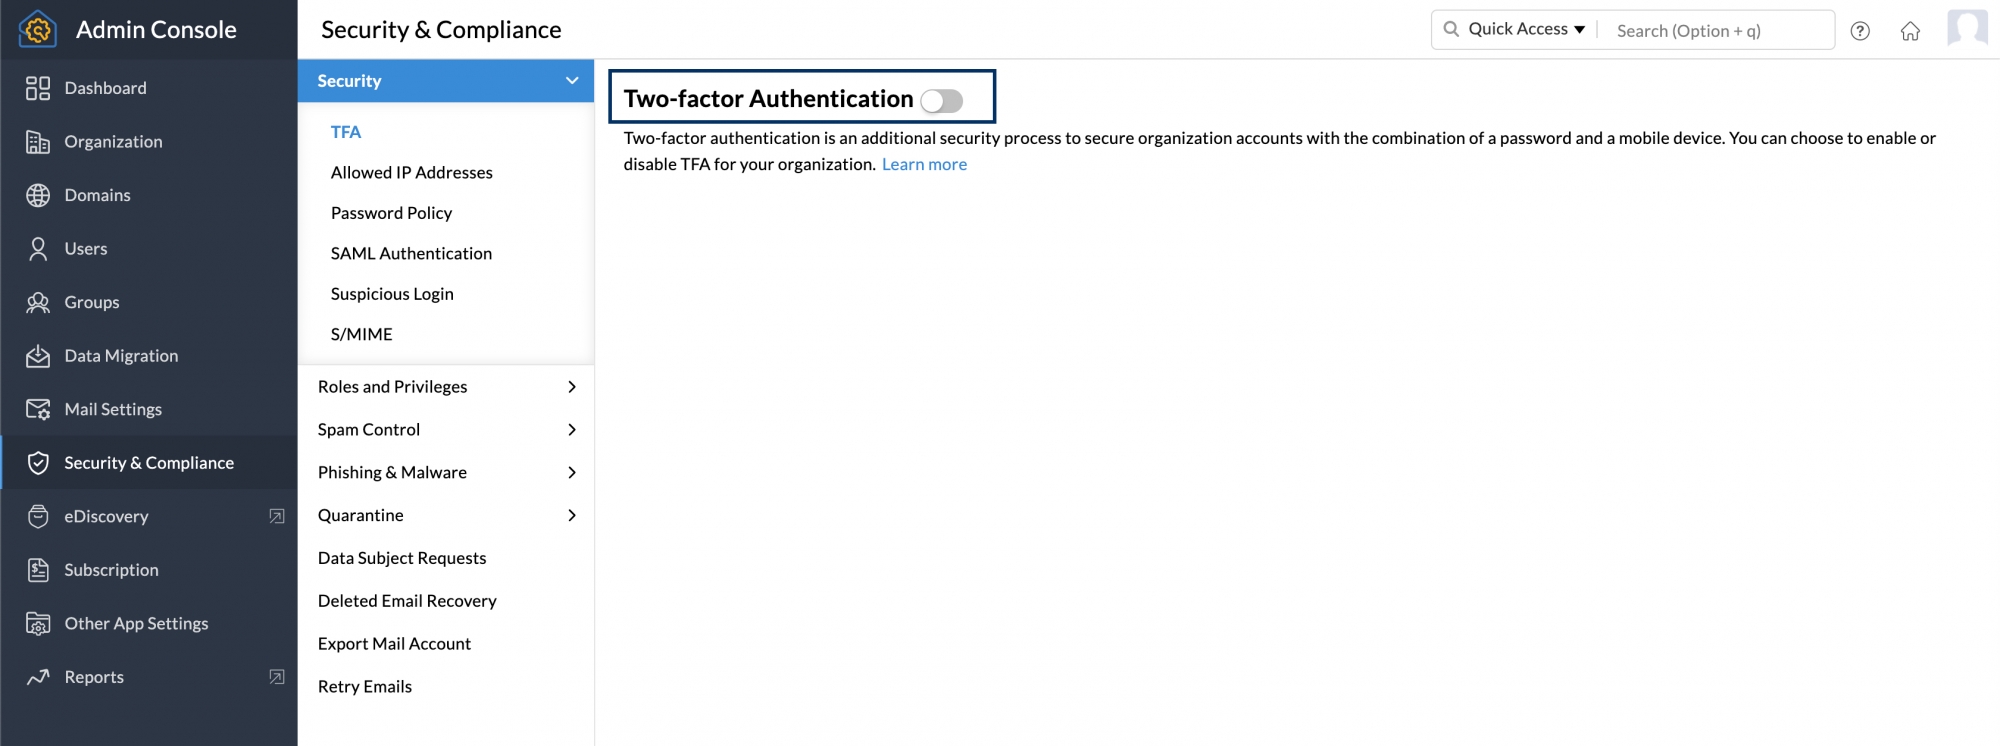
- Navigate to Security and Compliance in the left pane.
- Under Security, go to TFA and toggle it to ON
- Re-authenticate and verify your identity to perform this action, as this step is necessary to confirm that you are authorized to make changes to the security settings of your organization.
After the administrator enables TFA, the users will be prompted to choose their preferred TFA method, the next time they log in. If you want to disable TFA to the entire organization, you can follow the same steps and toggle it off
For information on the mode of TFA, refer to this help page.
Enable/ Disable TFA for Specific Users:
The administrator can enable or disable the TFA status for users from the Control Panel.
- Login to Zoho Mail Admin Console
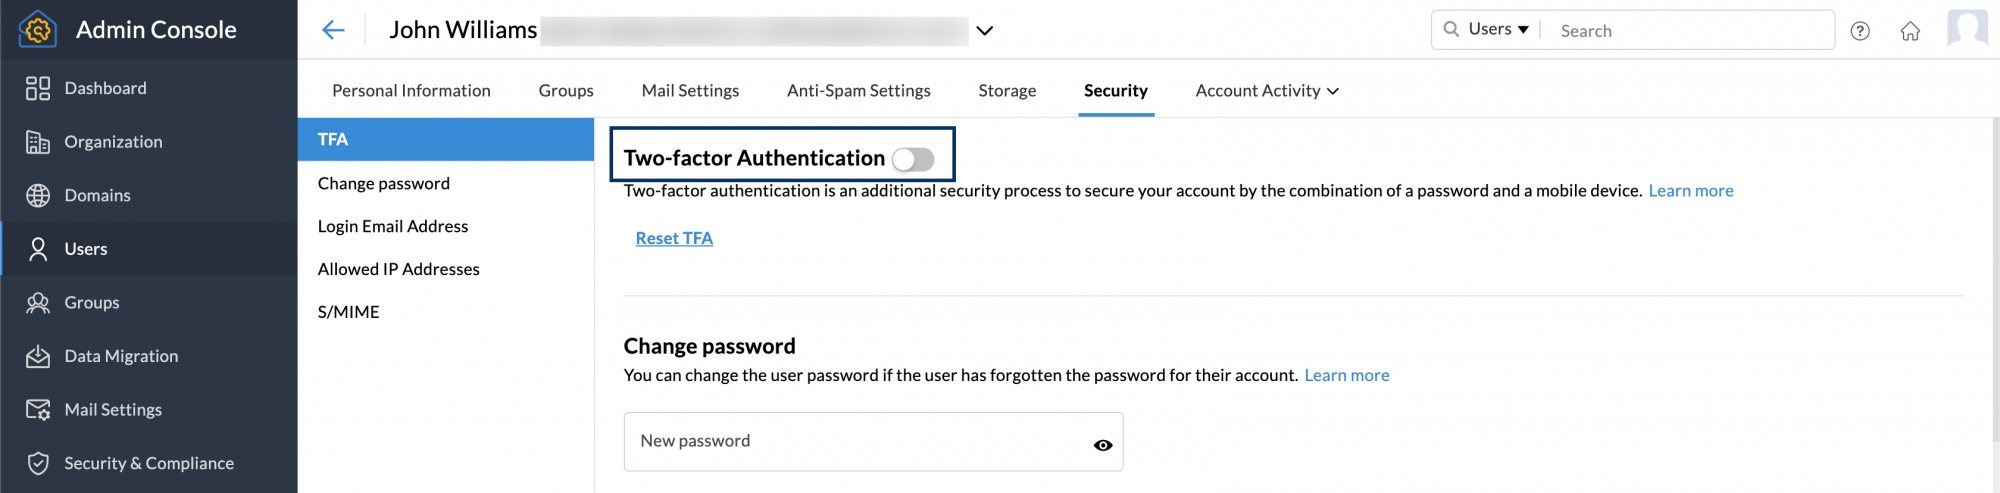
- Navigate to Users in the left pane and click the user you would like to enable or disable TFA.
- Go to Security settings, click TFA, and toggle it off
- To proceed with this action, you will need to re-authenticate your session to verify your identity for security purposes.
Reset TFA for specific users
The administrator can reset the TFA for users, in case they lost the mobile device or do not have access to the mobile device they used at the time of TFA activation. To reset the TFA of a user,
- Login to Zoho Mail Admin Console
- Navigate to Users in the left pane and click the user you would like to reset TFA.
- Go to Security settings, click TFA, and click Reset TFA.
- You'll be prompted to re-authenticate your session to verify your identity for security reasons.

Once reset, the user can set up their TFA mode afresh during sign-in.
Note:
- Whenever you make any changes to the TFA settings of a specific user or the entire organization, it is mandatory to re-authenticate your session to ensure that only authorized users can perform this sensitive action.
- Re-authentication will be done using the MFA (Multi-Factor Authentication) method configured on your account for security purposes. If you do not have MFA configured for your account, you will be prompted to re-authenticate your session using your account password in a new tab or window, depending on your browser preference.
- For TFA (Two-Factor Authentication) updates, re-authentication is required every five minutes after you verify your identity. During this five-minute window, you can make additional changes without needing to re-verify. However, if you attempt to make a change after this period has elapsed, you will need to verify your identity again.
Generating App-Specific Password
If two-factor authentication is enabled for an account, then the users have to provide the application-specific password when they access their account via POP/IMAP or Active Sync. To generate an app-specific password,
- Login to Zoho Accounts
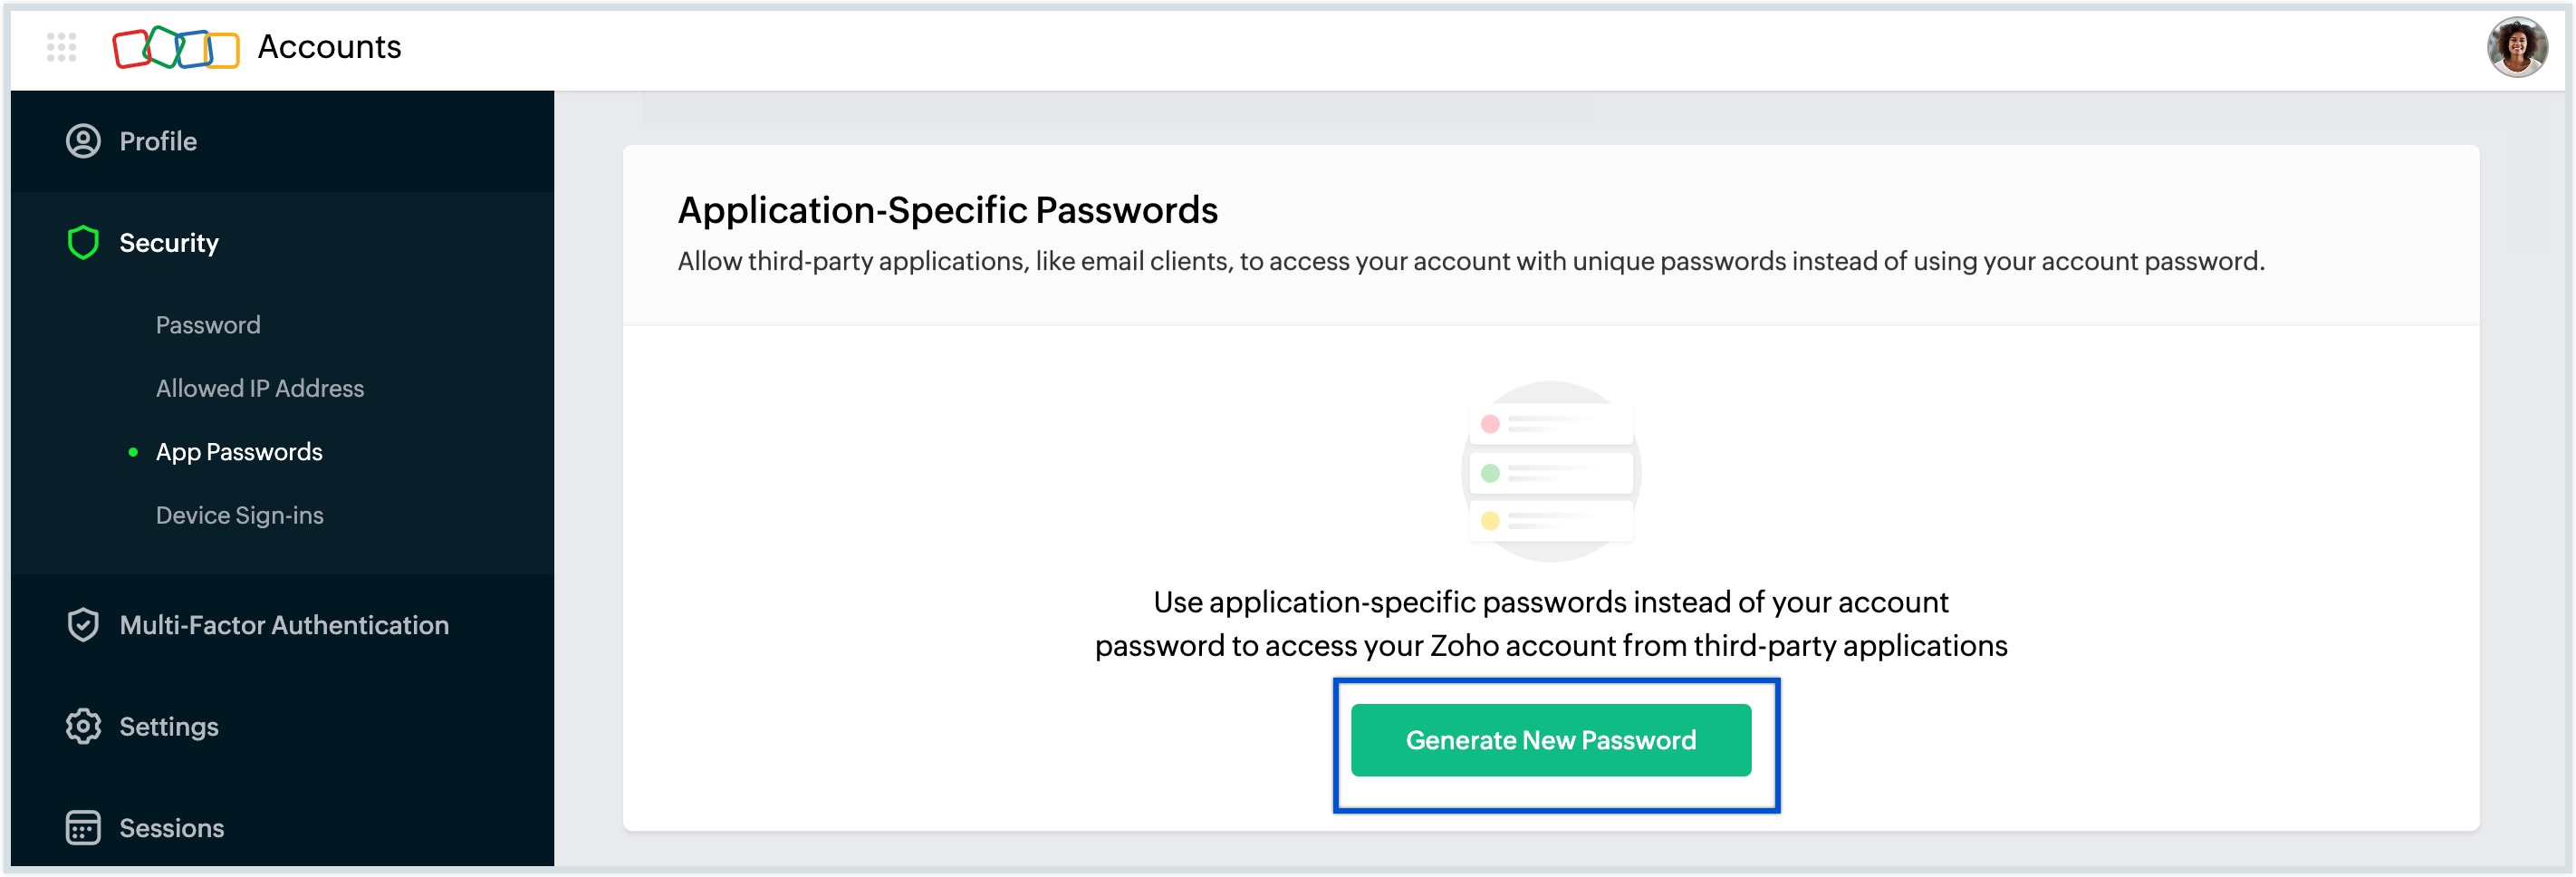
- From the left menu, navigate to Security and click App passwords
- Click Generate New Password.
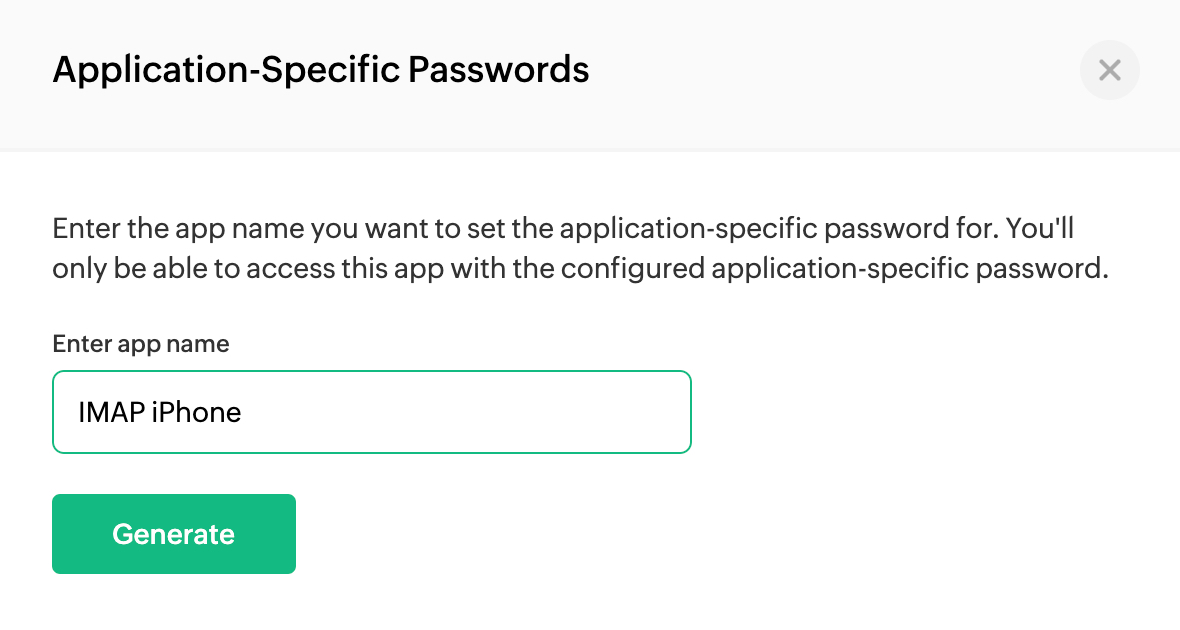
- You will be asked to give a name the name of your application for future reference. Enter the name and click Generate.
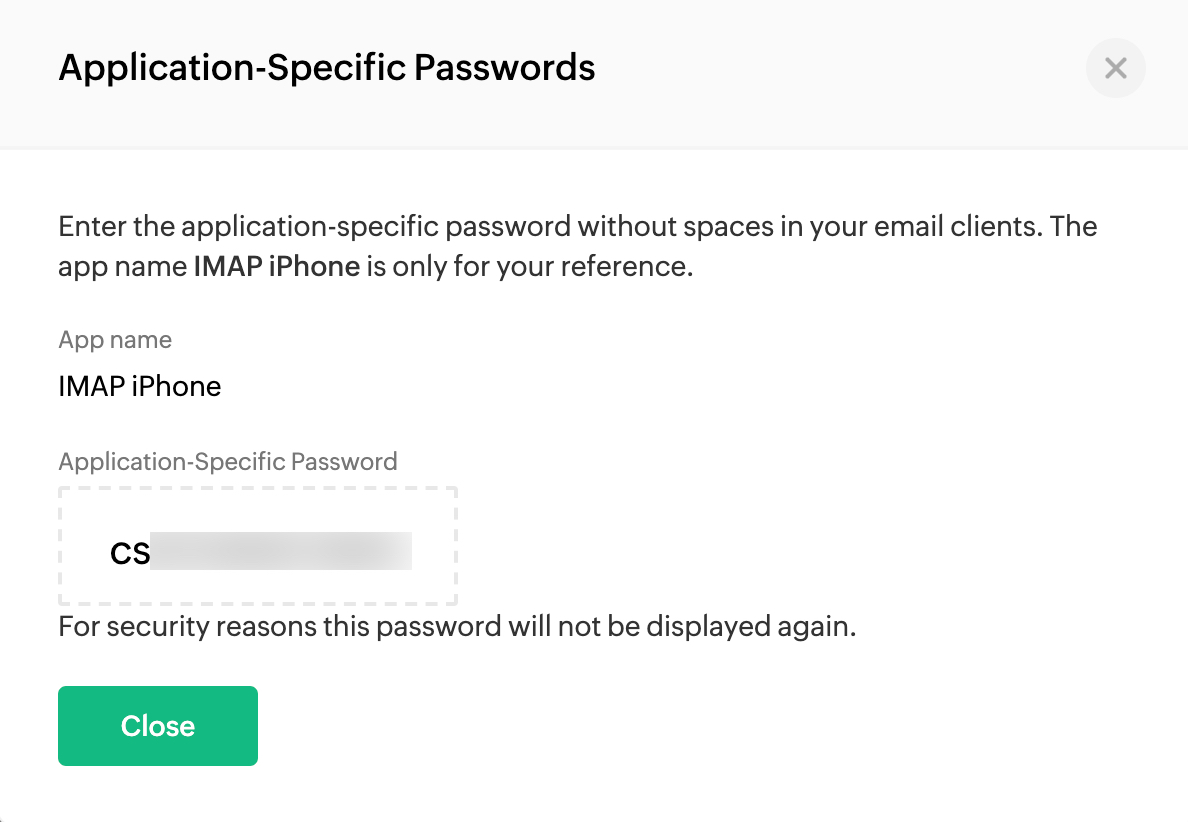
- Your password will be generated and it can be used to login from one application.
App Specific Password will be required:
- To authenticate clients use Zoho Mail as an IMAP/ POP account.
- To sync your Zoho Calendar with calendar clients using CalDAV.
- To authenticate clients use Zoho Mail as an IMAP/ POP account for organization users with SAML login.
Note:
- The device-specific password will be displayed only once and will be not be displayed again.
- When providing the password in your email clients, enter it without any spaces.
- You can delete an application-specific password whenever you longer use that device or application or want to revoke access to that application.